| REMOVING THE JAGUAR ENGINE | |||
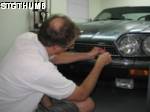
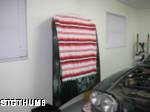
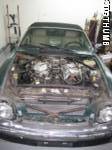
Making the First CutI hadn't quite internalized the fact that the Jaguar's hood opens from the rear, which would make it really hard to work on the front of the engine bay. So I went on the internet and found that it was pretty simple to pull the hood. You disconnect the gas struts, remove the front grille, then reach through the open grille and unbolt the four hood bolts. Be sure to mark the location of the hood on the hinges with a marker or an awl. Then you and your assistant (Linda) lift the hood off and prop it against the wall with suitable padding. |
|||
 |
 |
 |
|
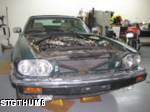
That was easy. Next it was clear that the plastic piece behind the front air dam had to come off. That took a few bolts, and I had access to the underside of the radiator. That was enough for one day. |
|||
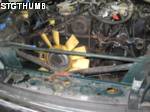
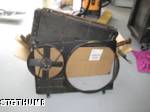
Some Serious WrenchingI didn't have a service manual yet, but it was pretty clear that the radiator and A/C condensor had to come out. I removed the lower radiator hose and drained the radiator into a five gallon bucket. Then I removed the radiator header plate. I removed the bizarro soldered brass tubing apparatus on top of the radiator header plate. Before I could remove the header plate I had a policy decision to make. There were two fuel injection-looking connectors on top of the plate, each connected to what looked like an aluminum heatsink, but which had to be more complex. The heatsinks both said Marelli on them, and were cast, so I figure they were either injection- or ignition-related. There was no way to get the connectors free of the header plate because the wiring passed through a small hole in the plate -- the connectors must have been attached in place. On the spot I adopted a policy of destruction when required, and cut the wiring so I could remove the connectors, and then the header plate itself. Next was the rest of the radiator hoses, the transmission cooler lines, and then the radiator. The previous owner had said that the A/C was not working, so I removed the lines to the condensor, without a cloud of freon. I removed the condensor, and what I'm guessing is a muffler/dampener on the front of the condensor. That was enough work for one day. I cleaned up the car, mopped up the spilled coolant and ATF, and turned off the lights. |
|||
 |
 |
 |
|
References RequiredI realized I needed some sort of service manual. I could probably gnaw away at the
wiring, mounts, and various lines, until the engine was ready to come out, but it would
be a lot easier with some directions. I looked on line, but couldn't find a Haynes or
a Chilton's manual. I did find a couple copies of the factory service manual for about
$400. Finally I found some CD versions of the manual on eBay. Normally I really dislike
CD manuals, but they do have their uses. For one thing, you can print out pages you
need for a procedure, and not worry about getting them dirty. The drawbacks are that you
can't flip through the manual to quickly find what you want, and you can't use the
computer without getting it dirty. Maybe I need a cheap old PC, and a waterproof
membrane keyboard. Throughout this project I will be resisting the urge to get
sidetracked with things like setting up a PC to read the CD manual. That's why I have
no plans to upgrade the LT1. I think I could easily spend a lot of time and money
doing a full or partial rebuild on the engine. But it is already running! I want the
straightest path to get to a running Jaguar. I did take the time to prepare the
garage, but I think that will pay off in a big way by giving me a comfortable place to
work, which means I will be more likely to stick with the project. Anyway, I bought
the CD manual off eBay, and will be awaiting its arrival. Until then I will have to
find some simple things to do on the car.
Expert Advice |
|||
 |
 |
 |
 |
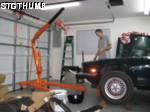
I've been making more incremental progress. The engine wiring harness is completely removed from the engine. I've cut the fuel lines and power steering lines. And a lot of the heat shields and panels around the transmission and driveshaft are out. There's still more things to remove I have an engine hoist now. I tried to borrow one, and to find one on craigslist, but didn't have any success. Part of the reason I didn't want to buy one is that I'll have to store or dispose of it when this project is over. Of course, I might fall in love with engine swaps and use it regularly. Anyway, I bit the bullet and went into Harbor Freight, and found that the 2 ton folding lift I wanted was on sale from $219 marked down to $149. Add in the 20% coupon I had, and I was out the door with a 2 ton lift and 4 ton load leveller for $168. I've got the lift assembled, and it looks like it should do the job fine. Things have been going pretty well. There have been some fasteners in awkward places, but nothing rusted or stripped, and no snapped bolts or studs. There is a coating of oil and other fluids that seems to have kept everything well lubricated. A few bolts have been surprisingly loose. The exhaust manifold stud nuts, and the driveshaft nuts were hand-tight. The rest of the engine wiring is off. I finally just kept going after every connector and wire until there was nothing connected to the engine. I got the ground strap off the engine, and removed the starter power cable at the firewall. I removed the brace across the front of the engine compartment. I'm not sure it's absolutely necessary, but it will give a few more inches of clearance when removing the engine. The engine is out!I was out in the garage last night removing the transmission mount, which is by far the most complex I have ever seen. It has three plates and a big coil spring that seems to suspend the tail of the transmission. I got everything out except the last plate, which would not come loose. Andrew had told me that there were a couple ears on one of the plates, which extend up into the tunnel and are hard to see, but I couldn't spot them. After ten minutes of looking I finally found them, and got the plate out. After that I had the driveshaft off in another ten minutes. I removed the shifter and the speedometer pickup, and I was done! ToolsA brief digression about tools. I have basic hand tools I have acquired over the years, mostly Craftsman and Husky, but more recently I have bought a few used Snap-On items off the internet. So far in this project I have not been stuck for lack of a tool. This whole car has come apart with:
Don't know about a 96, but back in the 70s, they used to say that they put those engine lift tabs on them at the factory, so you could hook a chain on it and yank it to put a SB Chevy in there. |
|||
